
Trailmakers Build Mode: Build Better Cars and Planes
Master Trailmakers build mode with useful tips for symmetry, hinges, pistons, and vehicle shaping. Build cleaner boats, planes, and cars with fewer errors.
Jump to
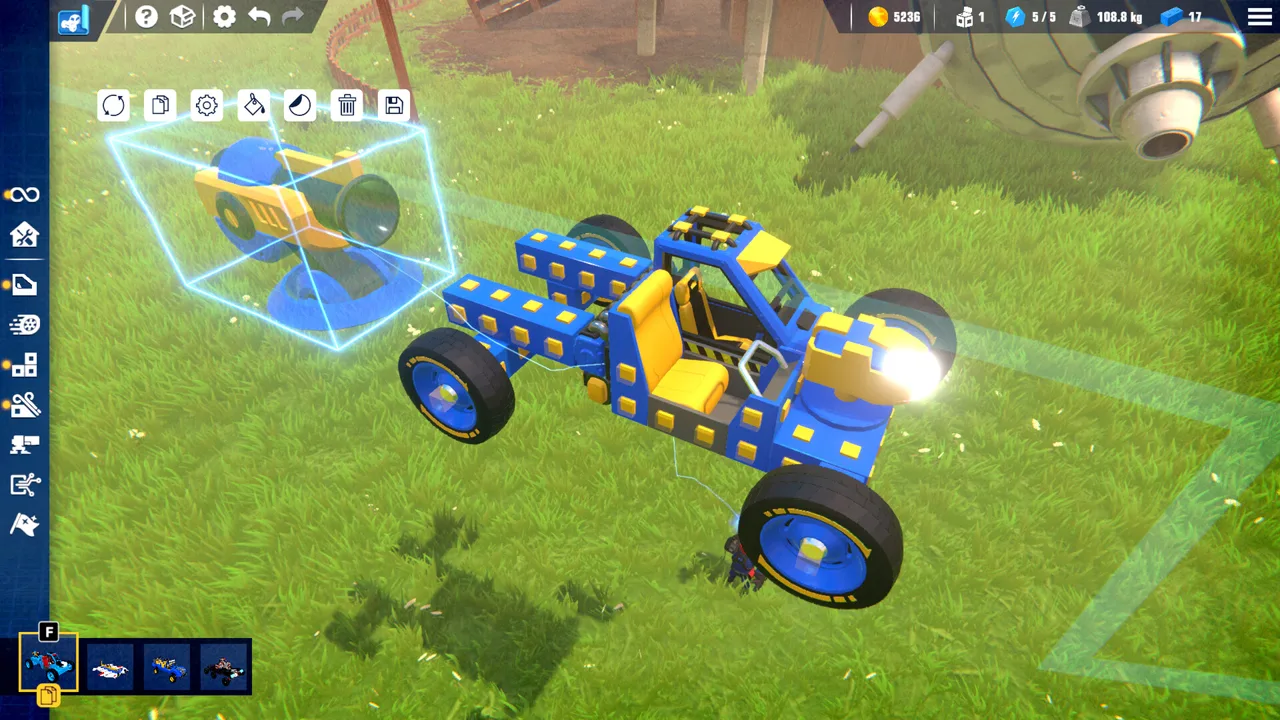
Start With a Connected Frame and the Right Tools
Trailmakers build mode gives you the tools to turn a boxy chassis into a curved hull, a pointed aircraft nose, or a detailed off-road truck. Those shapes depend on block connections, proportions, and carefully configured moving parts. Start with a connected frame, then refine individual sections so each change is easy to test.
On keyboard, press B to open the builder. Keep the controls panel visible while learning: its prompts change with your selection, and keyboard and controller layouts differ.
Duplicate Sections and Use Symmetry
Duplication saves time when building repeated structures such as wheel assemblies or hull supports. Select a block or group, then use the copy option. On mouse and keyboard, hold Ctrl while clicking to select multiple blocks.
The camera angle affects the direction a selection copies toward. When mirroring a copied group, move the camera to the opposite side and make sure there is a connection point to mirror from.
Symmetry mode mirrors edits across your build and also works with painting and decals. Use it while establishing matching sides, then inspect both sides after configuring moving parts.
Watch Weight and Complexity
The builder displays power core usage, vehicle weight, and block count. Complexity is a separate measure: functional blocks place different demands on the game, so block count alone does not describe how demanding a creation is.
Keep mechanical shaping focused on the sections that need it. Duplicate a finished assembly only after checking its connections and movement.
Official page: Trailmakers (playtrailmakers.com)
Configure Hinges, Pistons, and Control Inputs
Many blocks have settings beyond their placement and rotation. Select a block and open its configuration options to change its behavior.
 Image: Steam / Flashbulb
Steering Hinges
A hinge's colored arrows show its two movement directions. For logic signals, green is positive and red is negative.
The settings serve different purposes:
- Angle determines how far the hinge rotates.
- Speed determines how quickly it moves.
- Steering help slows steering movement relative to vehicle speed.
- Strength controls hinge stiffness.
- Hold position keeps the hinge where you leave it instead of returning it to center.
- Toggle keeps an input active until you press it again.
For a body panel that needs to hold a fixed angle, turn steering help down to zero so vehicle speed does not change how quickly the shaping hinge moves.
Pistons
A piston's start position controls its compression when the vehicle spawns. Its inputs control extension and retraction, while auto reset returns it to its original position.
Use piston positioning when a full block of movement is too much. Small offsets are especially useful for recessed trim and parts that need to sit between grid positions.
Keep Shaping Parts Activated
An altitude sensor provides a simple continuous signal. Set its threshold to the lowest available altitude and connect it to the hinge or other block you want activated. Above that threshold, it continues sending its signal.
Check the signal direction before adjusting the bodywork. A hinge receiving the opposite input will swing the panel away from its intended position.
Shape Bodywork With Hinge and Piston Overlaps
Hinge and piston glitches let you move blocks into overlapping positions after leaving the builder. Hinges rotate sections into place; pistons shift them along their travel.
 Image: Steam / Flashbulb
Use hinges to change a panel's angle and pistons to adjust its depth or alignment. A curved hood, for example, needs both its slope and its height to look right.
Connection layout matters. Trying to overlap blocks belonging to separate moving assemblies creates problems. For these shaping techniques, attach hinges to separate branches of a solid frame rather than stacking shaping hinges directly on one another.
Work through a small assembly before expanding it:
- Build a solid support.
- Attach the shaping hinge or piston.
- Add the panel you want to reposition.
- Configure its movement or starting position.
- Leave the builder and inspect the resulting overlap.
- Adjust the angle or offset before copying the assembly.
Keep the mechanism accessible while shaping. If a panel breaks away or refuses to move into place, inspect its attachment path and the assembly it is entering.
Build a Boat Hull With Gradual Angle Changes
A boat hull benefits from a clear centerline and side panels that narrow gradually toward the bow. Choose an odd overall width when you want a central row of blocks; it makes a centered tip easier to arrange.
 Image: Steam / Flashbulb
Start with a solid central frame. Add separate support branches for the angled sections on each side, keeping their shaping hinges attached to that frame.
To establish the hull:
- Choose the width of the main body.
- Place matching side sections on their own hinges.
- Angle the sections inward.
- Add another pair farther forward.
- Increase the inward angle as the hull approaches the bow.
- Shorten the forward sections where long panels crowd the tip.
An angle of 10 degrees provides a starting point for a shallow inward bend. If a gap remains, adjust that section slightly; 12.5 degrees is another example of a small shaping adjustment. Use those values as starting points, then fit each panel to the hull you are building.
Leave the bow tip until the neighboring panels line up. Its final shape depends on the remaining space and the blocks you choose.
Treat this process as hull shaping. Add and test the flotation and propulsion needed for a working boat before investing heavily in surface details.
Build Aircraft Noses, Center Propellers, and Check Forces
Aircraft noses combine several difficult shapes in a small space. Work on the nose as its own section so you can adjust its outline without rebuilding the whole fuselage.
Fit the Nose Pieces Together
For a pointed jet nose, use hinges to bring surrounding panels inward and pistons to tuck obstructing pieces deeper into the assembly. Inspect the profile from the side and above after each adjustment.
Learn the shapes of individual blocks before adding another mechanism. A rounded piece or tapered block that already follows the desired outline reduces how much repositioning the section needs.
Center Parts With Different Widths
A two-block-wide propeller assembly does not naturally align with the centerline of a three-block-wide fuselage. A piston offset lets you move the assembly between the usual grid positions.
A 0.15 piston setting is an example used to center that particular arrangement. Adjust the setting to fit your own assembly rather than applying it to every propeller build.
Shape Wings From Solid Supports
Use the same frame-and-branch method for angled wing sections. Keep each shaping assembly attached to a solid support, then bring the panels together with controlled hinge movement.
After shaping, inspect the aircraft's force markers. The builder displays centers of mass and lift, along with other force information that helps diagnose balance problems.
These markers reflect the aircraft's arrangement inside the builder. When pistons and hinges reposition substantial sections after spawning, test the deployed aircraft as well. Its final geometry is what matters in flight.
Use the aerodynamics view to inspect drag: bright green indicates low drag, while red highlights blocks producing more resistance. Adjust exposed sections and compare the display before adding more thrust.
Improve Cars With Proportions and Small Offsets
Cars demand careful proportions because the wheels, cabin, hood, and roof define the whole silhouette. Establish their relative size and spacing before adding lights or decorative trim.
For a sand rail, focus on a narrow frame and seats angled slightly backward. For an off-road truck, build around the wheel openings and engine area, then add details such as lights, a horn, and roof equipment.
Curve the Hood and Roof
Divide a curved hood into sections and use hinges to create its changing slope. Use piston positioning where those sections also need to sit lower.
Apply the same process to the roof over a larger area. Inspect how the roof joins the surrounding bodywork before filling small gaps; an awkward overall profile takes more work to fix once it is covered in detail.
Recess Trim Without Burying It
A full block of inset is often too deep for narrow side trim. Use a small piston offset to leave just enough of the piece visible.
Check the spacing around fenders, lights, and bumpers too. Slight angles and shallow overlaps help these parts follow the body instead of looking attached as separate boxes.
Audit Controls Before Driving
Engines automatically connect to the wheels on a build, and engine configuration lets you change which wheels receive power. Review those assignments when modifying the chassis.
Inspect control mappings after duplicating mechanical sections. An unexpected movement may come from an input assigned to the wrong block. Correct the mapping, then test the steering and moving bodywork before continuing with cosmetic changes.
Continue with
 Trailmakers Tutorial: Build Your First Working VehicleUse this Trailmakers tutorial to build a working vehicle, configure steering, reduce drag, and troubleshoot your cars, boats, and planes. Start building.
Continue exploring
Trailmakers Go Kart: Build and Tune a Stable Racer
Build a Trailmakers go kart with a low chassis, balanced weight, and responsive steering. Learn how tire settings and rear downforce shape its handling.

Trailmakers Helicopter Guide: Fix Spin and Tune Lift
Build a Trailmakers helicopter with servo settings that tame rotor torque, compare blade options, and learn how to control lift without constant climbing.
Join the community
Official channels for news, updates and player help: